Apple are known for their well-designed products, often aesthetically pleasing, and sometimes functionally innovative as well.
The design of the MagSafe Power Adapter reveals the great deal of thought that had gone into its product development, and with its extension attachment and other features, it is quite the versatile charger as any MacBook user will tell you.
Even then, any product has a certain lifespan, and with constant use, the adapter cable is likely to give way before the lifespan end of the machine or equipment it serves.
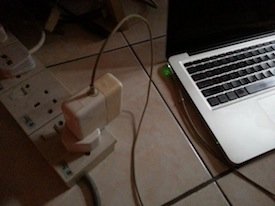
I have owned my 13″ MacBook Pro for about 4 years now, and while the MacBook Pro still runs (very) fine, the cable that charges it isn’t.
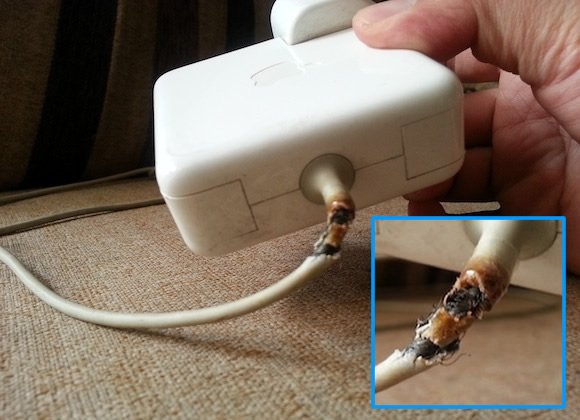
The adapter is still running well, but the cable at the point where it emerges from the adapter had taken more strain than it could handle over the years, and started to break after the third year or so.
It wasn’t completely detached, just that the insulation had started wearing and eventually broken to bits – I had used cellophane tape to hold it together, which lasted for a good 6 months.
The time finally came when the tape could no longer hold it together, and the cable was detached enough not to carry a charge through.
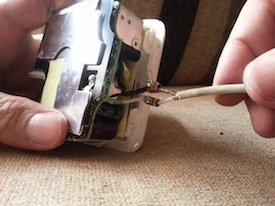
The cable is especially weak at this area of the adapter, and strain over the years has resulted in cable fray and insulation wear. The only way forward is to first open the adapter casing.
TOOLS AND MATERIALS REQUIRED TO REPAIR MACBOOK PRO CHARGER:
MagSafe Power Adapters are easily available for purchase at the Apple Reseller Store, but I wasn’t going to give in by buying one, not if I can help it – by way of repair! Today we will look at that.
One thing is for sure – Apple did not design the MagSafe Power Adapter to be user-serviceable. It is never easy to open any or most of Apple’s products, and the MagSafe Power Adapter is one fine example. Because of that, do expect some cosmetic damage in the repair process. The extent of damage will depend mostly on your patience in trying to open the adapter.
The tools needed are given in the box on the right. The task will require about 45 minutes to an hour to complete. Some of the technical know-how required for this repair work is beyond the skill of the novice.
It is highly recommended that you scroll down through the photos and work description below to gauge if this repair work is within your capability and inclination.
Once you’ve got all the tools ready, we may begin.
Advertisement
A. Opening the MacBook Pro Adapter
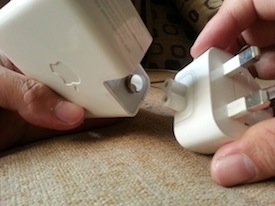
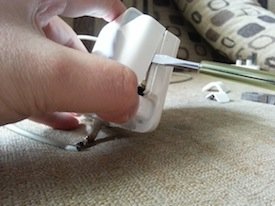
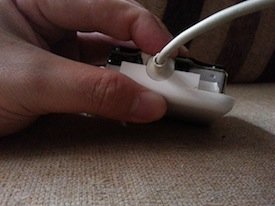
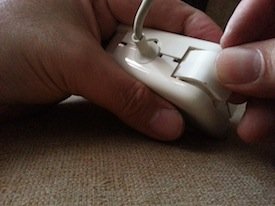
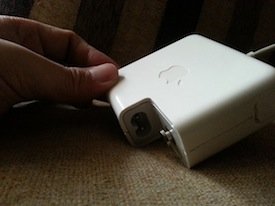
A1. First, remove the 3-pin plug head from the adapter by sliding it out.
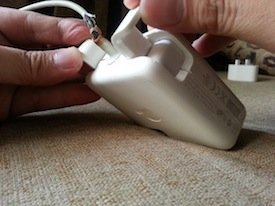
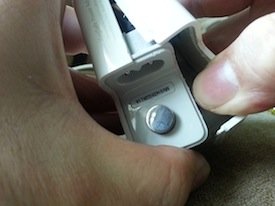
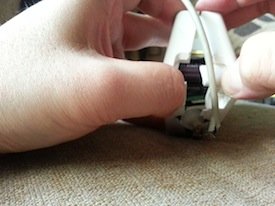
A2. Next, unfold and lift up both “L”s used for winding the cable around them.
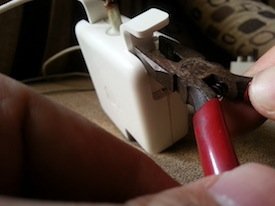
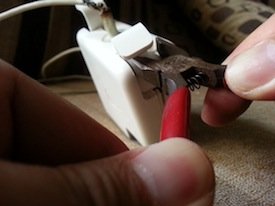
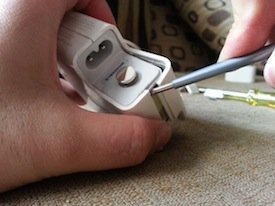
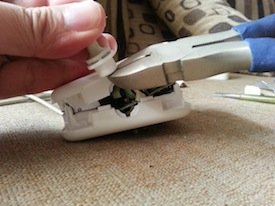
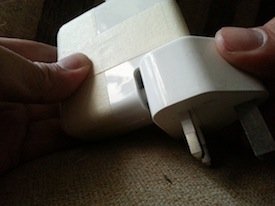
A3. Insert the pliers into the space for the “L” and pry open the halves of the adapter casing. Some force with a little jerk may be required to split it open.
A4. Once it is split open, the “L” will be dislodged at its hinge. Remove the “L” by pulling it out, together with the tension spring just below it.
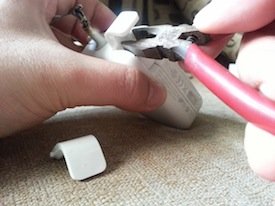
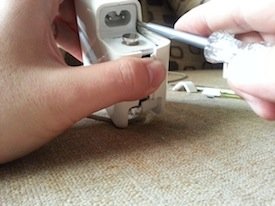
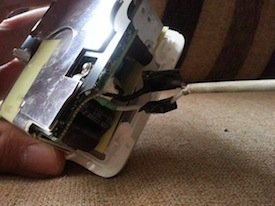
A5. Pry open the casing as much as possible with your fingers. Re-use the pliers for leverage if necessary. Expect some cosmetic damage as it was never meant to be opened by the consumer!
A6. Do the same using the pliers with the other “L”. Remove the “L” as soon as it is loose from its hinge, as well as the tension spring below it.
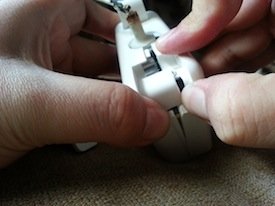
A7. Again, try and pry open and split the adapter casing as much as you can with your fingers.
A8. You may also work your way through with a test pen or slot screwdriver, but use this as an alternative or last resort as this causes the most cosmetic damage to the casing edge.
A9. As you reach near the plug pins, you may need to use the test pen to split it open…
A10. …by working your way around the edges with a prying action. Ignore the cosmetic damages – it’s quite unavoidable!
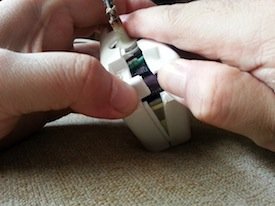
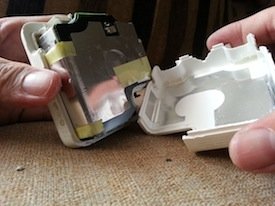
A11. Once you’ve worked your way through enough, the casing can be split by hand.
A12. You can open the remaining areas of the casing by hand.
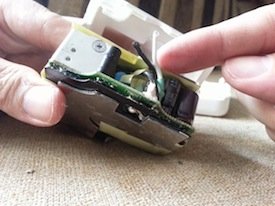
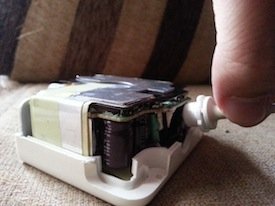
A13. It’s tough work, but you’ll know you are there when the two halves of the casing is physically separated.
A14. I’d say a pat on the back is in order!
B. Rewiring the Adapter
OK, here comes the even trickier part.
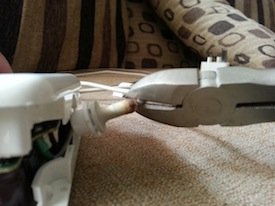
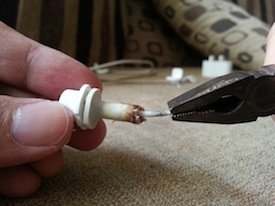
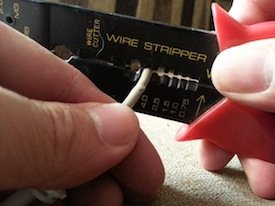
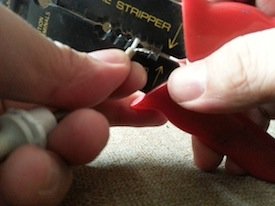
B1. We’ll start by snipping the wire at the point of breakage, with a wire cutter. Do not cut the flexible grey wire guide – just cut the white insulation immediately after it.
B2. Next, cut the two wires (black and white) immediately before it. Easy enough!
B3. Having separated the cable guide from the casing completely, the remaining wire within it will need to be removed. Use a pair of flat-nose pliers to pull it out.
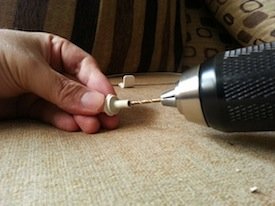
B4. Clear the internal diameter throughout with a drill or rotary tool as we will need to reuse this cable guide later. The internal diameter should be large enough to run the main cable (and its insulation) through.
B5. Clearing the internal diameter took me awhile. Once that is done, pull the cut end of the main cable through the cable – with a (pair of) flat-nosed pliers if necessary. NOTE: See Conclusion below for additional modification.
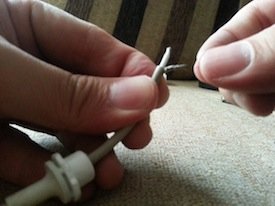
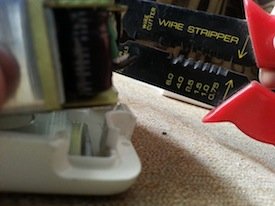
B6. With the cable that was just pulled through, remove about half an inch of insulation from this end with a 6 mm gauge wire stripper. Be sure to pull through long enough for this to be done comfortably.
B7. There will be two sets of wires which will be exposed at this point – one which is insulated in white, and another which is bare and loose without any insulation. Twist the bare wire so that it is bound tightly together.
B8. With a wire stripper, remove about 5 mm of insulation from the other wire. Use the 1.5 mm gauge wire stripper for this.
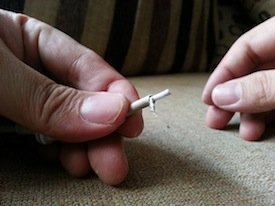
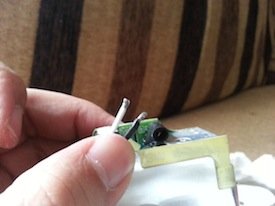
B9. The two ends of the wires should look something like this at this point of the installation.
“OK, now let’s take a look at the adapter side of things…”
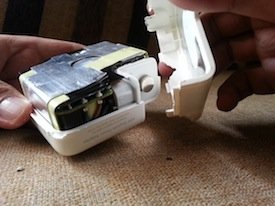
B10. Next, we will prep the cables on the adapter casing side. Look for the 2 wires, one with black insulation and the other with white insulation. These were snipped off from the cable guide earlier.
B11. Use a 1.5 mm gauge wire stripper and snip off about 2 – 3 mm of insulation from each wire.
B12. Twist the multi-strand wire tight so that it is not loose and open. Do this for both the black- and white-insulated wires.
B13. The wires should look something like this once you’re done with the steps above.
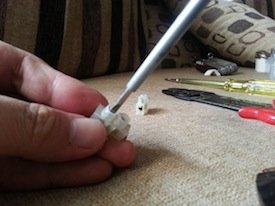
B14. We will then need a connector to connect the two sets of wires in the cable. Get the smallest connector block you can find – these are usually use in electronic projects. I happen to have a few sizes in my house. Remove both screws from the block.
B15. Once the screws have been removed, slide the brass connector insert out from its translucent plastic holder, as shown above. The plastic holder can be discarded as it will not be needed.
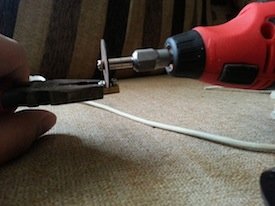
B16. As we are working in very tight space within the adapter casing, the whole brass insert is actually too long to fit comfortably in the casing, and will need to be cut in half, best done with a rotary tool, if not with a hacksaw. Be sure not to cut exactly in the middle and not into either screw hole. The screw may be inserted before running the rotary tool to prevent the cutting disc from reaching the screw hole as seen above.
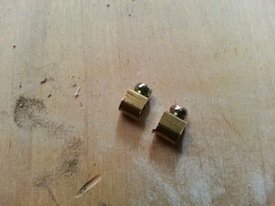
B17. The brass insert sawn in half as shown, with screws in place. You may use the rotary tool or a file to deburr any rough edges left from the cut.
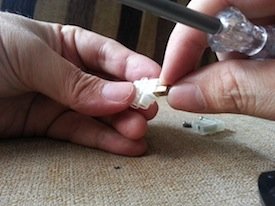
B18. Use both halves of the brass insert as connectors between the adapter casing wires and the main cable wires worked on earlier. White to white, and black to bare. Ensure that the screws are tight enough to secure the wires from slipping out.
B19. Wrap each brass insert and any exposed wire with electrical tape. This seems like a simple task, but is actually a very critical step that must be done correctly. Both wires must never be in contact with each other and any conducting surface must be thoroughly insulated with electrical tape!
WARNING: Step B19 above must be done with extreme care and attention to ensure that there is no electrical or conductivity contact between the two sets of wires. Any short-circuiting may result in fire, injury or irreparable damage to connected equipment upon plugging in and operation of the adapter.
Get It On eBay
C. Closing and Sealing the Adapter
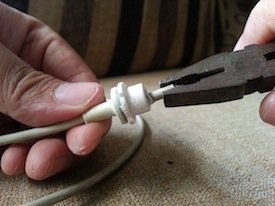
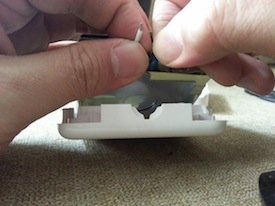
C1. Tuck the brass insert and all wire in whatever little space there is in the adapter casing and guide the cable guide to its rightful slot on the casing edge.
C2. The cable guide should sit nicely into its slot in its original position before the casing was opened.
C3. Replace all tension springs and “L”s before snapping the two halves of the adapter casing shut.
C4. Snap the adapter casing shut around the edges. It should now look like how it was before it was opened, minus a few cosmetic damages along the split line.
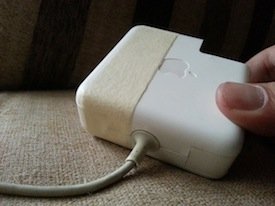
C5. Seal across one side of the adapter casing with masking tape or fabric tape, to keep the casing from opening apart.
C6. Seal across the second side of the adapter casing and reinstate the 3-pin plug head. It is probably not best to seal the casing permanently with any form of glue at this point, until we are certain that the adapter works the way it should.
D. Testing the Repaired MacBook Pro Adapter
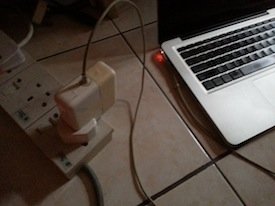
D1. Plugging in the MagSafe Adapter and turning it on, the LED on the magnetic connector turns green immediately…
D2. …and duly changes to orange, indicating that charging is taking place – a good sign that everything above has been done correctly!
Congratulations – mission accomplished!
Conclusion
In hindsight, I should have added a polyethylene sleeve (such as tubing used in aquarium) before pulling the cable through in Step B5. This will help reinforce the cable to prevent future premature damage. A fabric tape wound around the cable guide and cable may also help to reinforce this weak point of the cable.
Alternatively, use POW and MAG Clips from MagSavior once you’ve completed the above repair work.
If your cable is not damaged yet (which is unlikely if you’ve searched and found this article), perhaps this is a good time to get one. Or, if you believe that your MagSafe Adapter is beyond economical repair, or you just don’t have the time to repair it, just buy a replacement unit outright. Please see the links below for purchase.
MAGSAFE MACBOOK ADAPTER REPLACEMENTS
APPLE MACBOOKS
MAGSAFE ADAPTER PROTECTION AND REPLACEMENT CABLES
NEW ORIGINAL AND OEM REPLACEMENT MAGSAFE ADAPTER AND PARTS (SELECT FOR YOUR MACBOOK MODEL AND VOLTAGE)